Star SP700 Impact Printer Setup on Windows
Overview
Star SP700 is an impact (non-thermal) printer. It requires 76mm non-thermal paper roll.
It is highly recommended to utilize SP700 as kitchen printer, as it is splash and heat resistant; also the printer makes sound notification when printing a receipt.
Connecting Star TSP100 LAN Printer to a network
1. On the back of the printer, input the printer power source cord and plug it into to an outlet.
2. Plug an ethernet cable into the Ethernet port on the printer. Plug the other end into a LAN port on the router.
3. Turn printer on by pushing down power button.
Installing Printer Driver on Windows
1. Please follow this link to download printer driver: https://starmicronics.com/support/download/starprnt-intelligence-software-full/
2. Double click on download in bottom left corner to open file location and extract files.
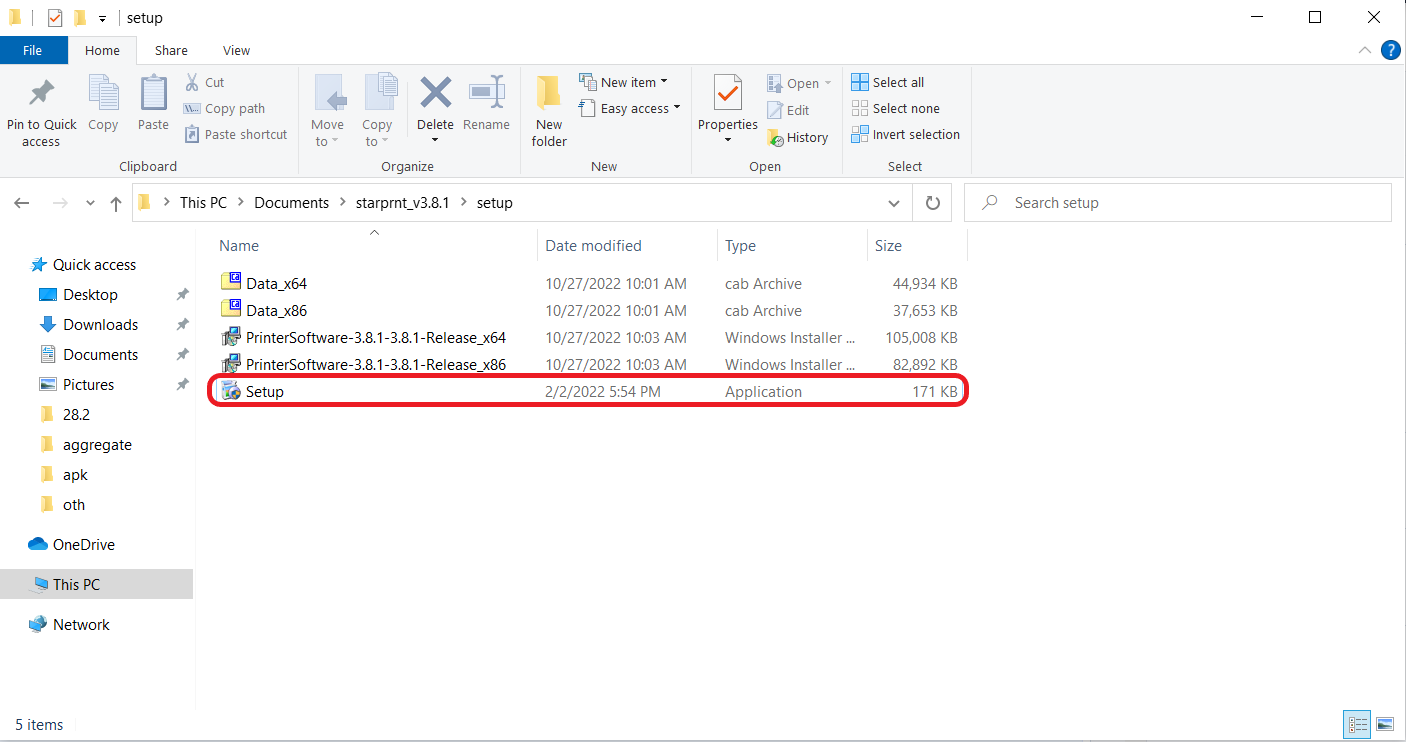
3. Please open the folder with extracted files, go to Setup folder and double click on setup.exe file:
It will start installing the driver. If it asks you to select setup type, please select Typical.
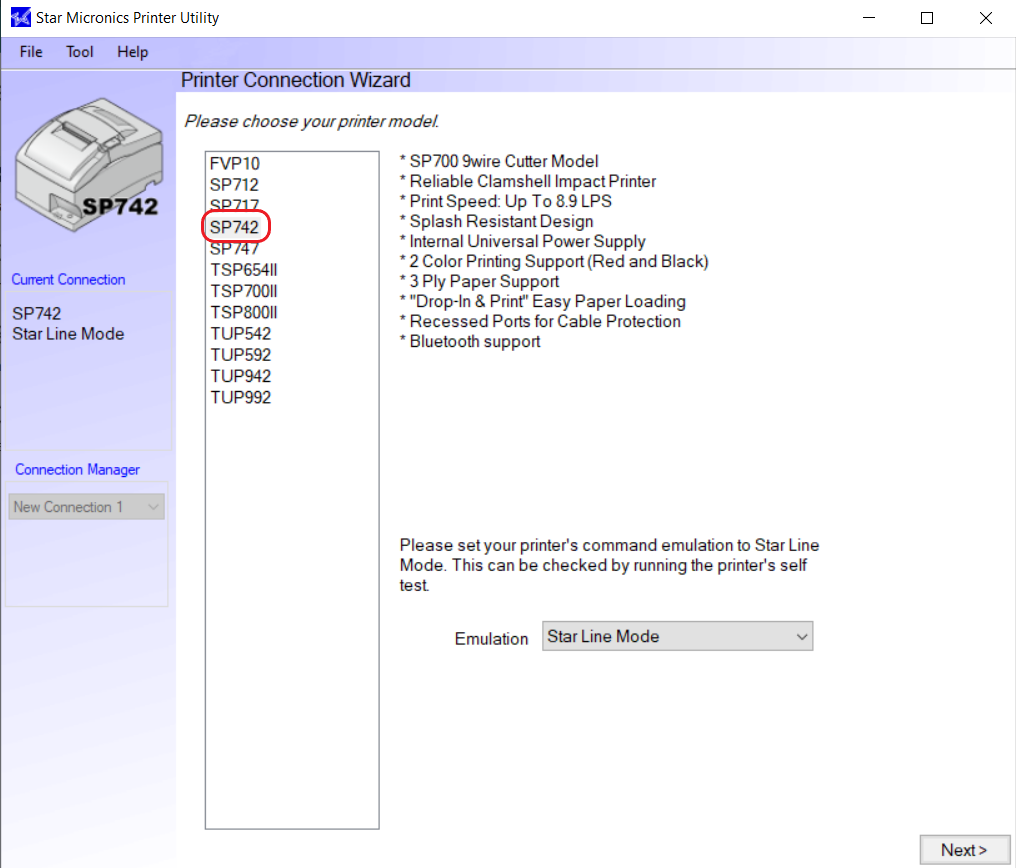
4. Once installed, please open Printer Utility Star PRNT and select SP742 printer from the list, and click Next:
5. Select Ethernet for interface, click Search Network:
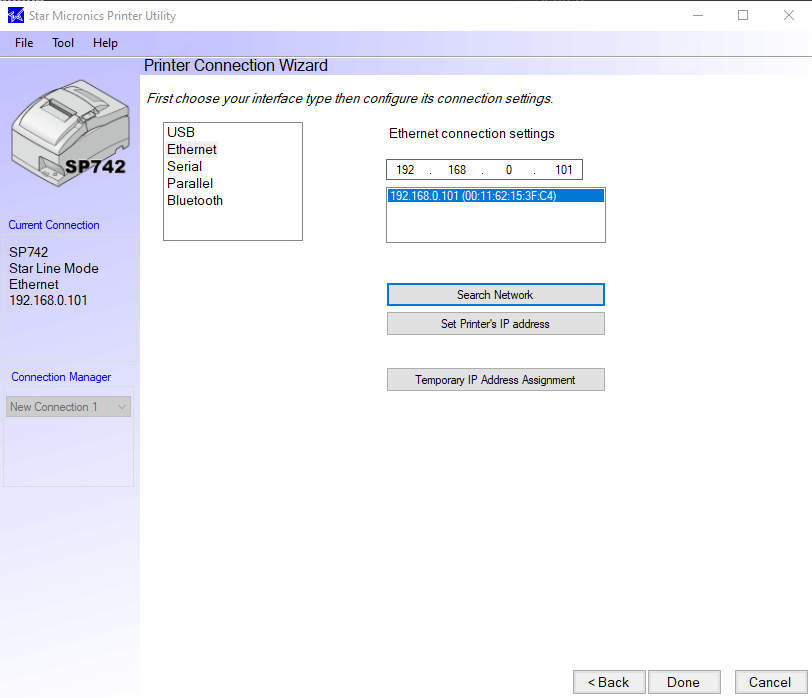
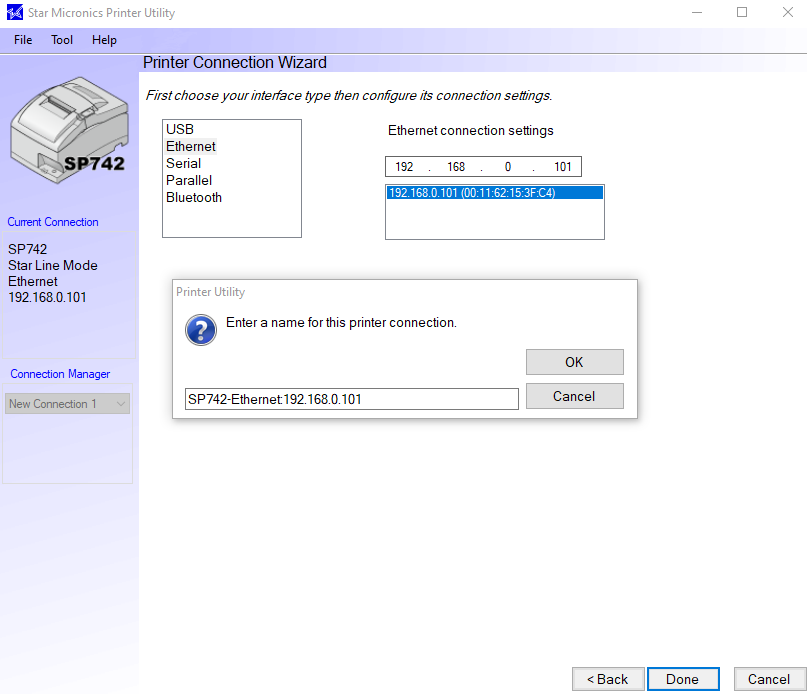
It is going to pick up the printer's IP address, and will ask for connection name. Can be left default:
5. Select Ethernet for interface, click Search Network:
It is going to pick up the printer's IP address, and will ask for connection name. Can be left default:
Click OK on this and the following screen:
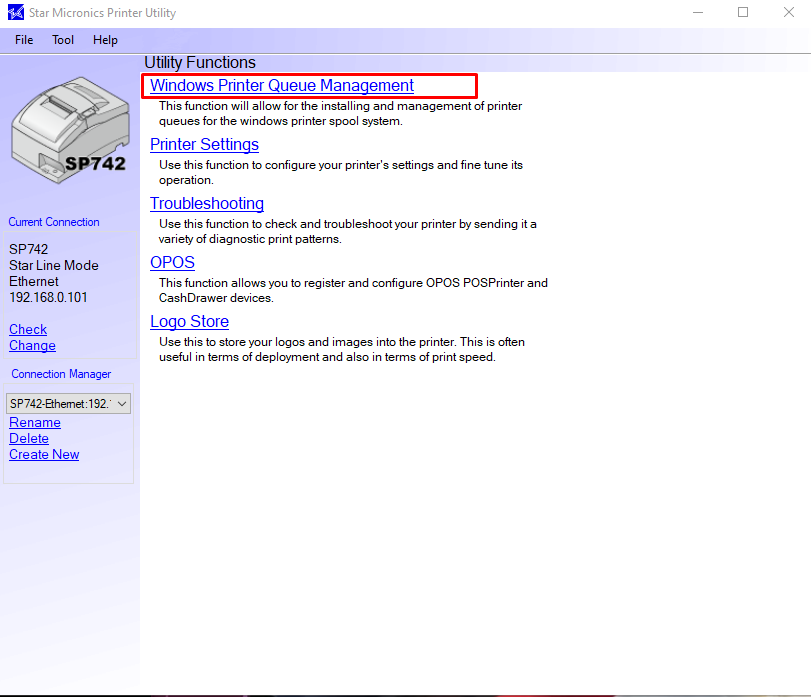
6. Proceed with Windows Printer Queue Management:
If gives you an option to install software, please do.
After that please add the printer to the queue by clicking Add button:
It's going to pick up your printer's name and connection type. Click OK:
Your printer is now connected to your Windows device. You can print a test page to make sure it works.
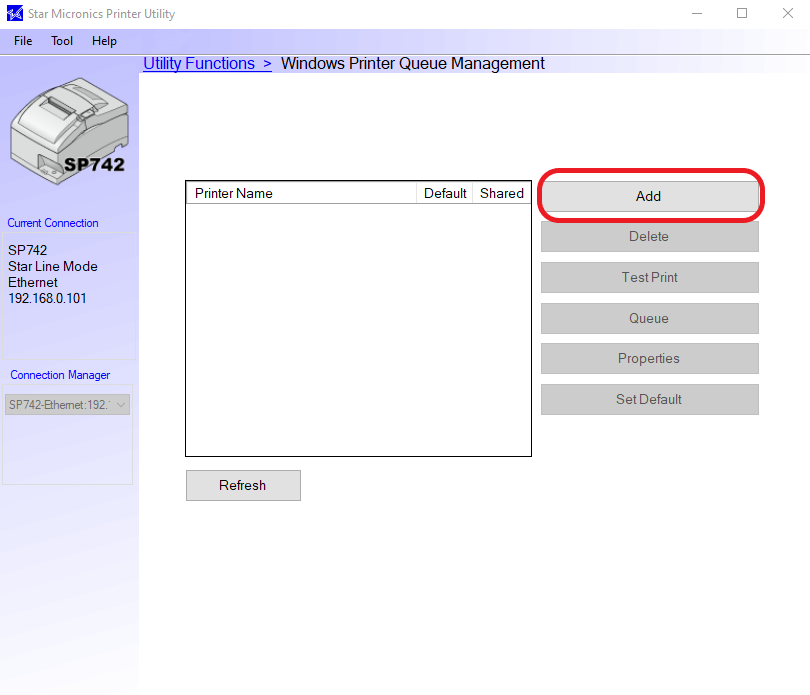
If gives you an option to install software, please do.
After that please add the printer to the queue by clicking Add button:
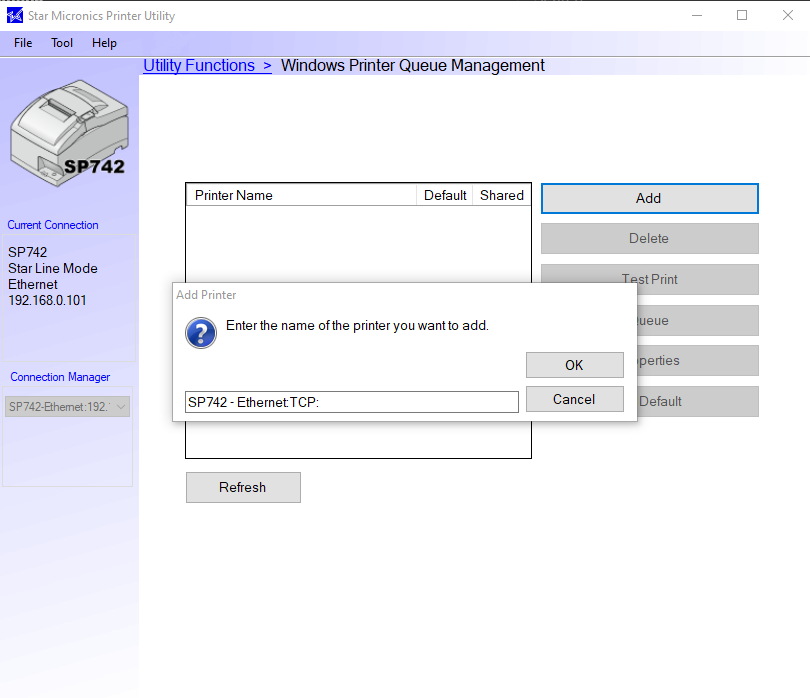
It's going to pick up your printer's name and connection type. Click OK:
Your printer is now connected to your Windows device. You can print a test page to make sure it works.
Setting up Star SP700 Printer to POS on Windows
1. Make sure your printer is configured, turned on, and on the same network as your Windows device.
3. Open eHopper POS app on your Windows device and log in to your account.
4. Open the left menu and click Settings > Printer Setup > Search for printer:
7. SP700 printer will appear on the list of printers. Select the box next to each printer you want both types of receipts to print from.
Note: For kitchen receipts to print, you must select the Kitchen Receipt option in the Receipt tab of your Back Office Store Settings.
- For info on setting up directional printing for your kitchen printers, please see https://desk.zoho.com/portal/ehopper/en/kb/articles/directional-printing-for-kitchen-printers
8. Choose 76mm as the paper width for both printer types.
9. Print a test page by clicking Print test page to ensure the printer works and is set up properly.
10. Click the DONE button.
Related Articles
Star SP700 Impact Printer Setup on Android
Overview Star SP700 is an impact (non-thermal) printer. It requires 76mm non-thermal paper roll. It is highly recommended to utilize SP700 as kitchen printer, as it is splash and heat resistant; also the printer makes sound notification when printing ...Star Bluetooth TSP650II Printer Setup on eHopper POS
Overview Once it is set up, you can use the Star Bluetooth TSP650II Printer with eHopper on Android, iPad, and Windows devices. Connecting Star Bluetooth TSP650II to Tablet 1. Switch printer on by pressing the on switch. 2. Open Bluetooth Settings ...Star TSP100 LAN Printer Setup on eHopper POS
Overview Once it is set up, you can use the Star TSP100 LAN Printer with eHopper on Android, iPad, Windows, and Poynt devices. Connecting Star TSP100 LAN Printer to Tablet 1. On the back of the printer, input the printer power source cord into the ...Star TSP100 LAN Printer Setup on Poynt 5 Terminal
Requirements Must have Freedom Package Must have selected Poynt from Payment Gateway drop-down menu in Store Settings of Back Office. Instructions 1. Turn on Star TSP100 LAN Printer 1. On the back of the printer, input the printer power source ...Star TSP100 LAN Printer Setup on Poynt Smart Terminal
Overview Before you can use the Star TSP100 Printer on your Poynt device, you will have to configure it and set it up with eHopper. Requirements Must have Freedom Package Must have selected Poynt from Payment Gateway drop-down menu in Store ...