Tools for Email/SMS Marketing Campaigns
Overview
Instructions
1. Log into your website.
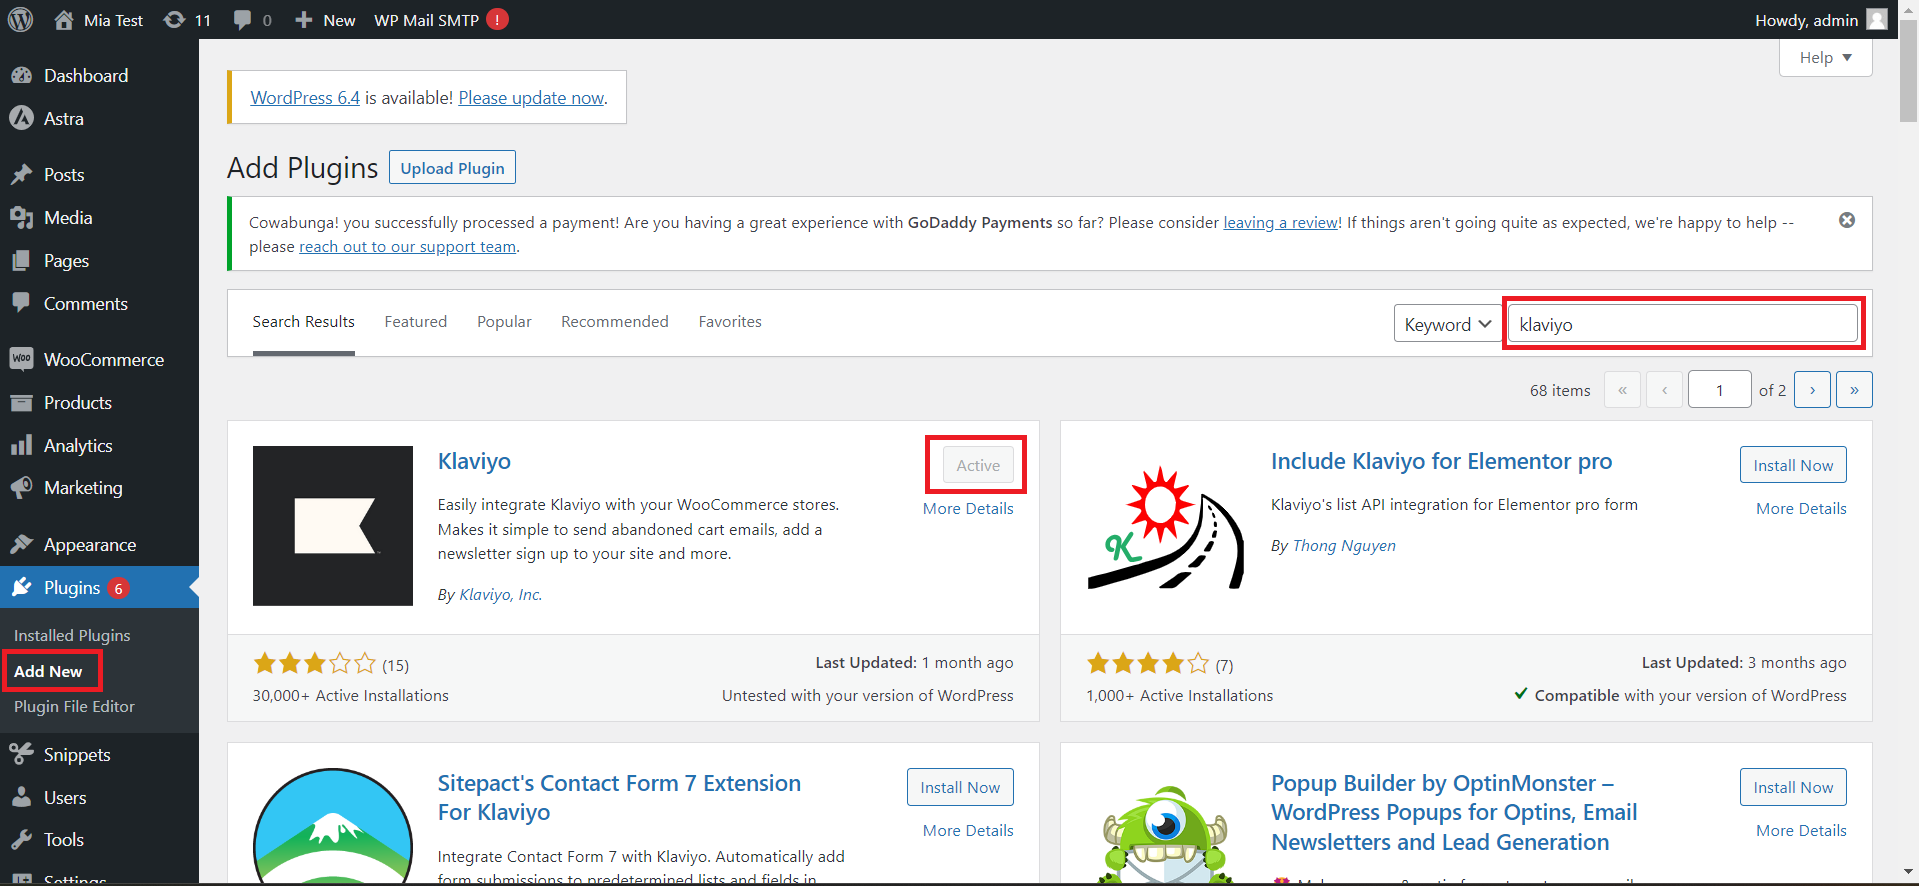
2. Go to Plugins > Add new > search for Klaviyo plugin > Install > Activate.
3. Go to Marketing tab on your website navigation menu > select Klaviyo > click Create account.
*In case you already have a Klaviyo account, please click Connect account button.
*In case you already have a Klaviyo account, please click Connect account button.
It will redirect you to Klaviyo website.
Please fill in the form with your business info, and click Get started.
Please fill in the form with your business info, and click Get started.
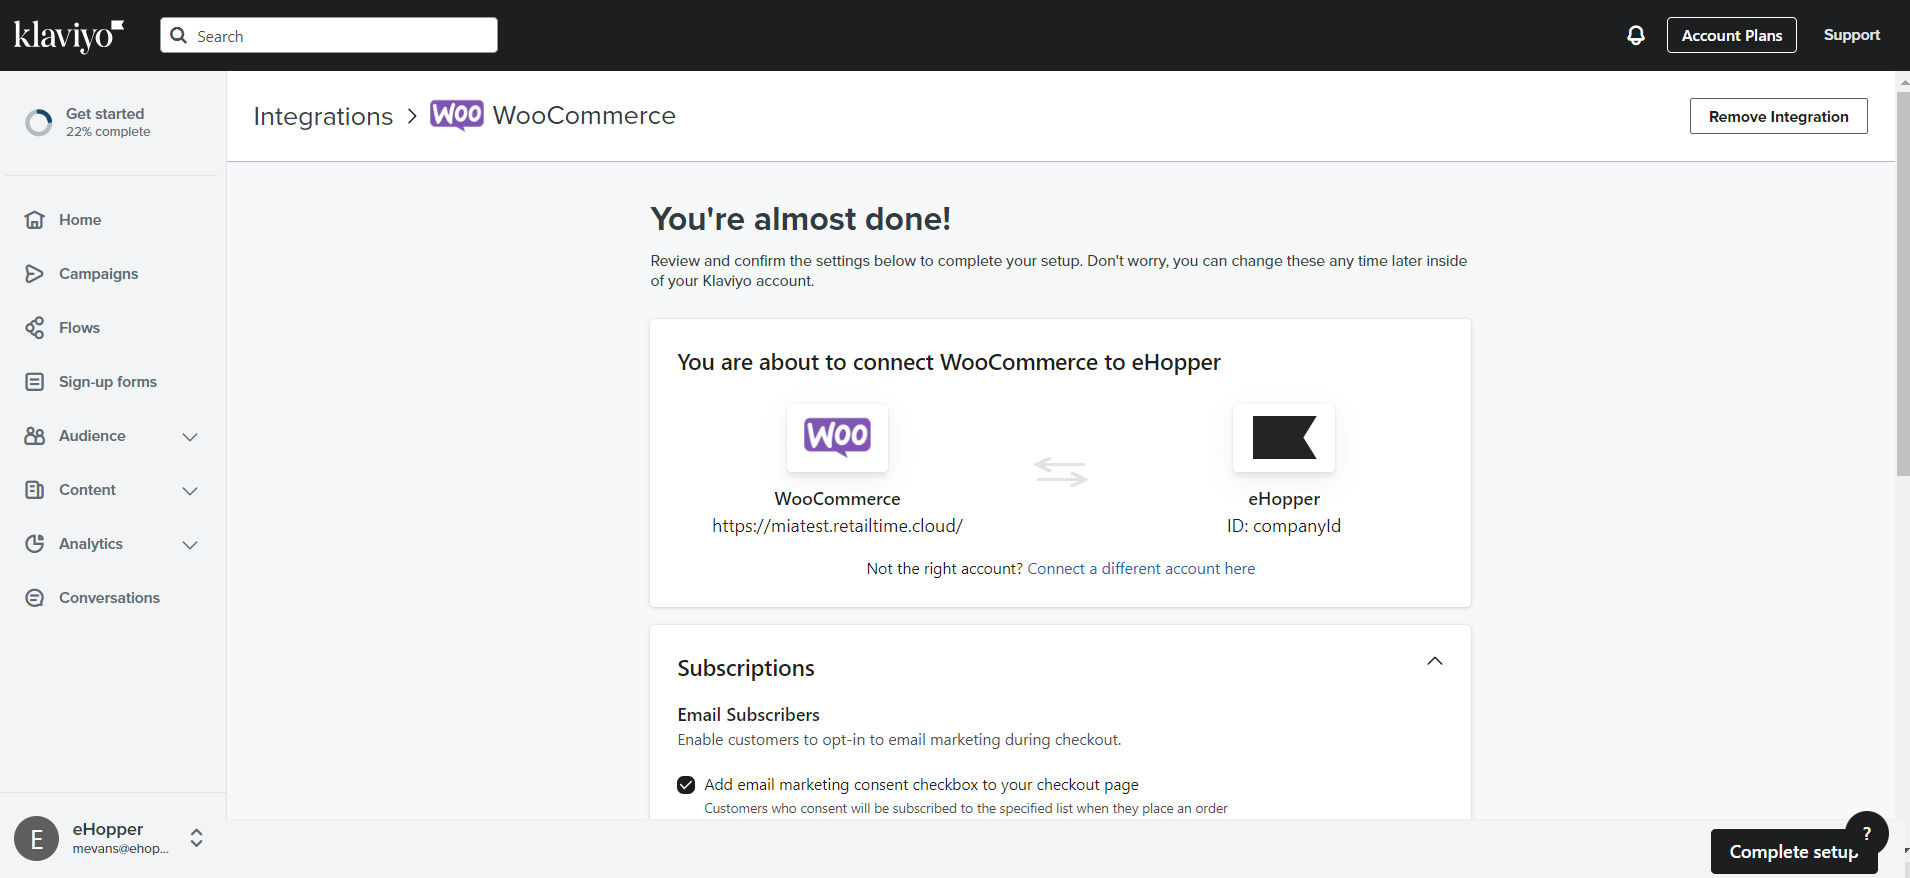
4. Approve connecting your newly created Klaviyo account to WooCommerce, and start setting up the integration. Please see the info on integration set up here: https://help.klaviyo.com/hc/en-us/sections/360005996231
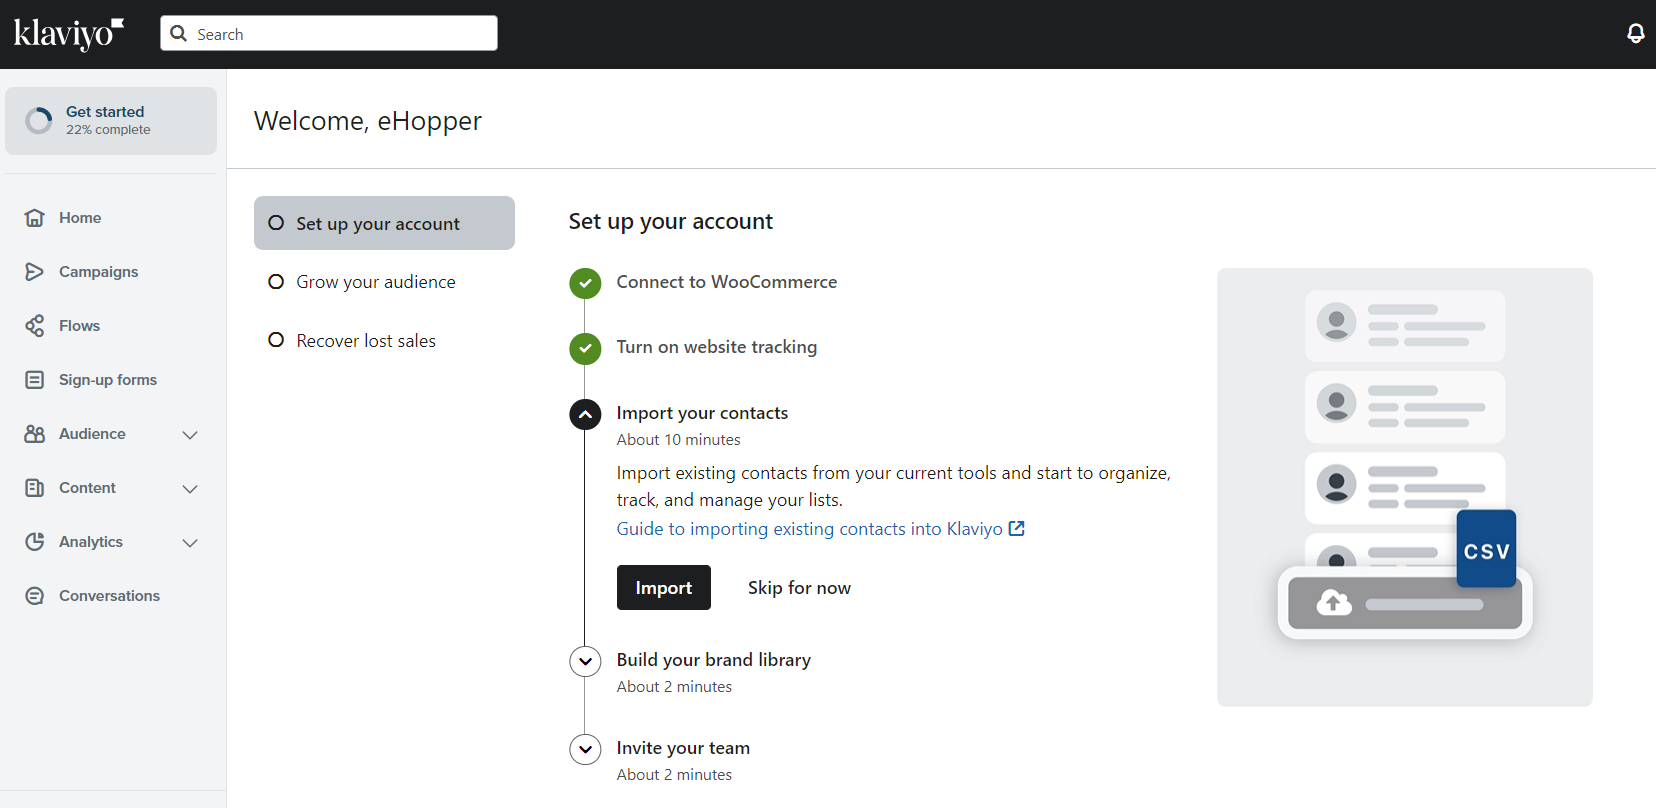
5. Now you can import your customers to be able to use the list for your future campaigns. If you already have your customers registered on your website, you can skip this step.
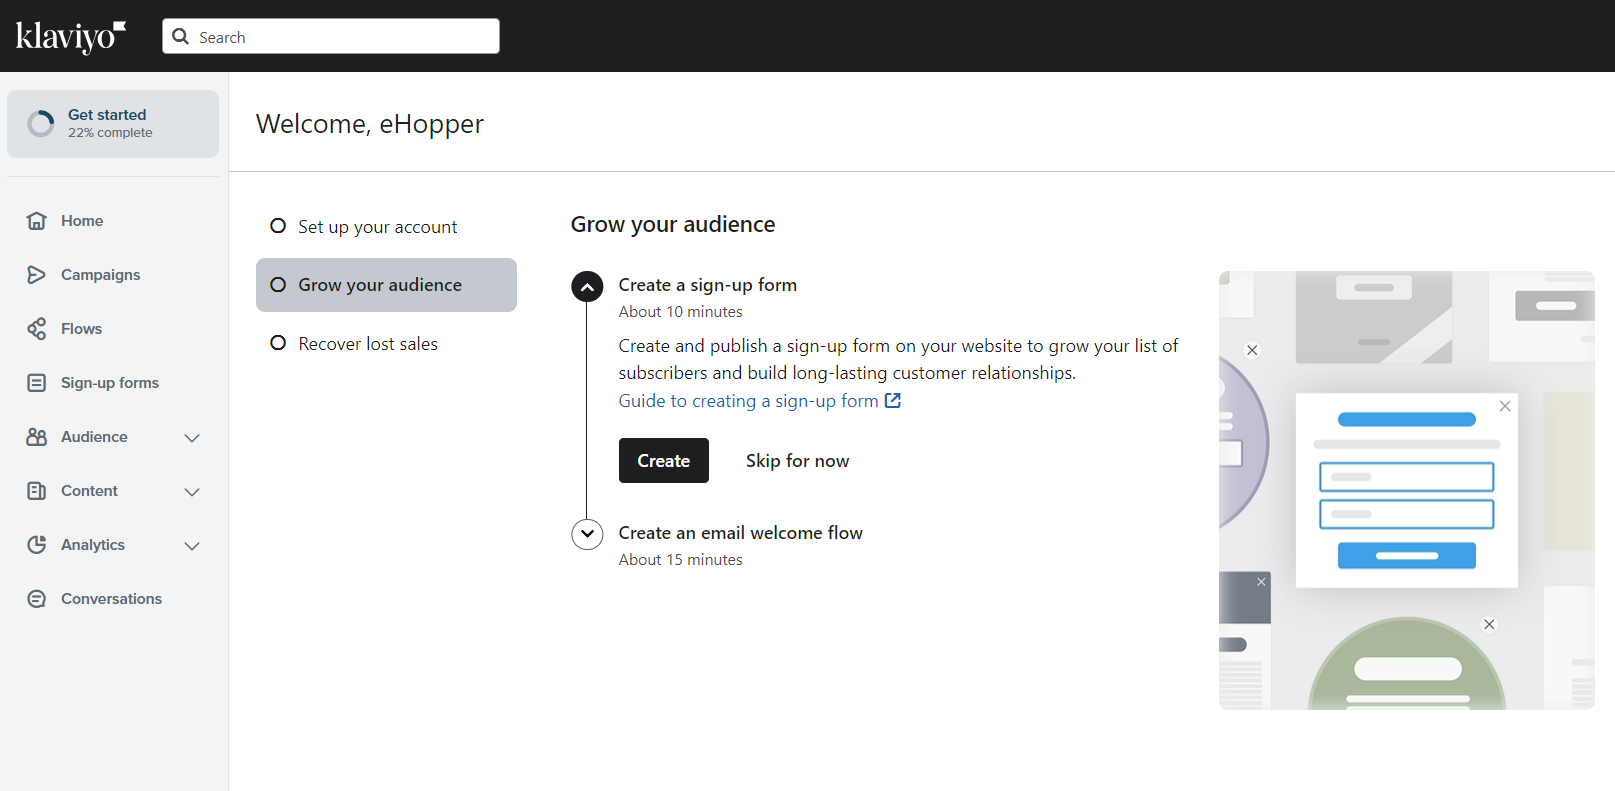
You can also create a sign up form on the website to grow your audience.
There are many more options that you can explore. We've listed the most essential ones for your convenience. Please feel free to use Klaviyo Help center for more info.
6. Once the integration is set up, and you have a list of customers that you want to send your promotions and newsletters to, you can start your first campaign.
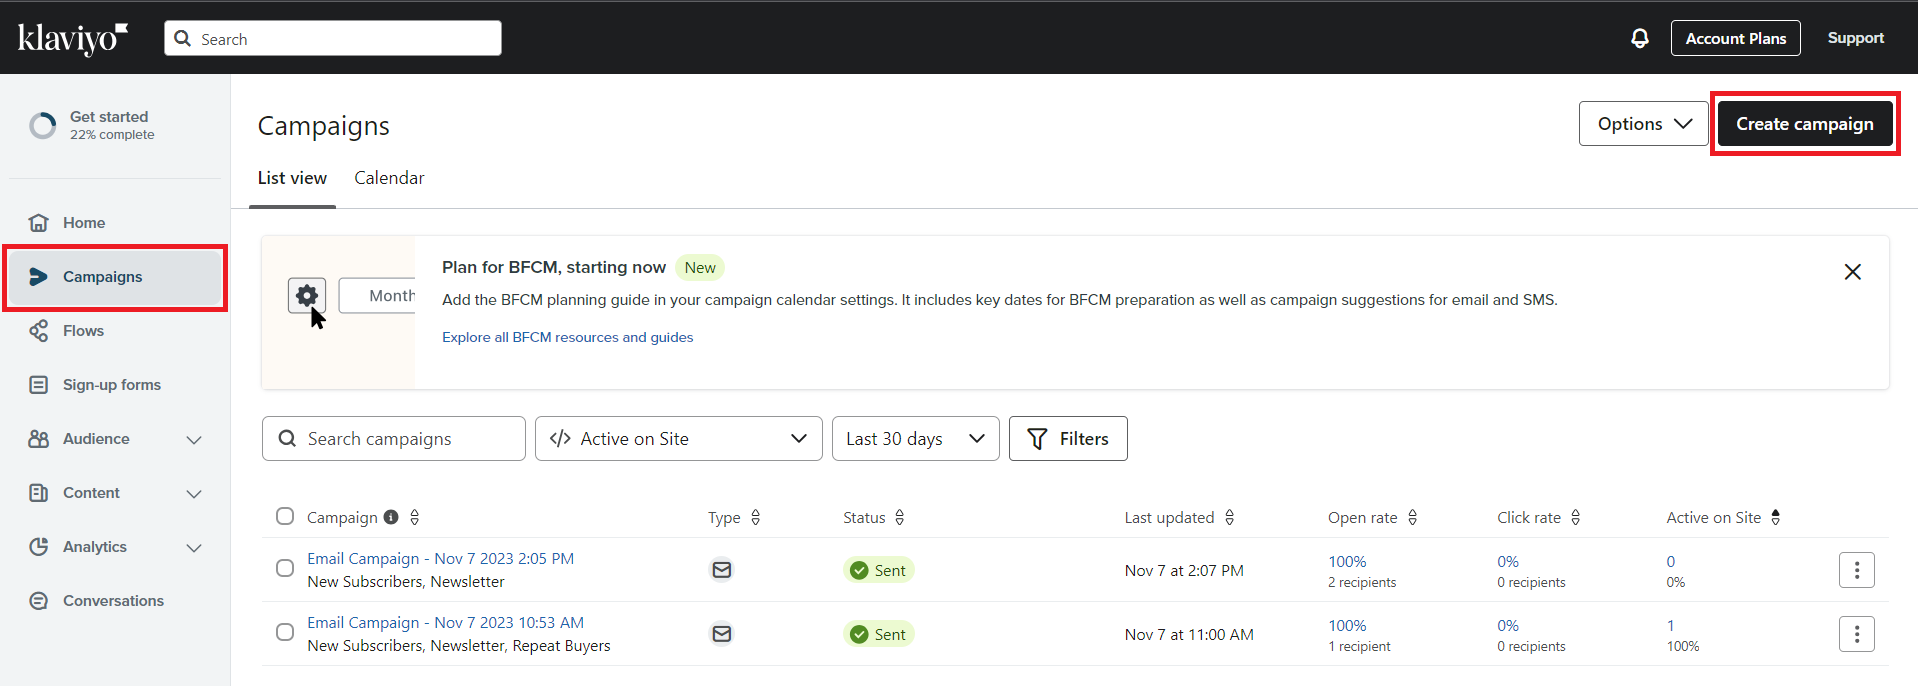
6.1 Go to Campaigns tab on Klaviyo navigation menu > click Create Campaign.
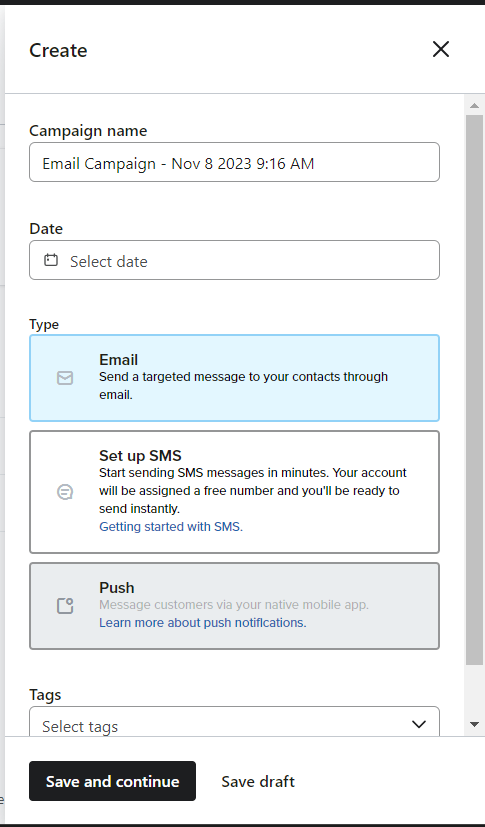
6.2 Name you campaign, select date and type, create tags > click Save and continue.
6.3 It will lead you to the screen where you can select the recipients of your content. Once done, click Continue to content.
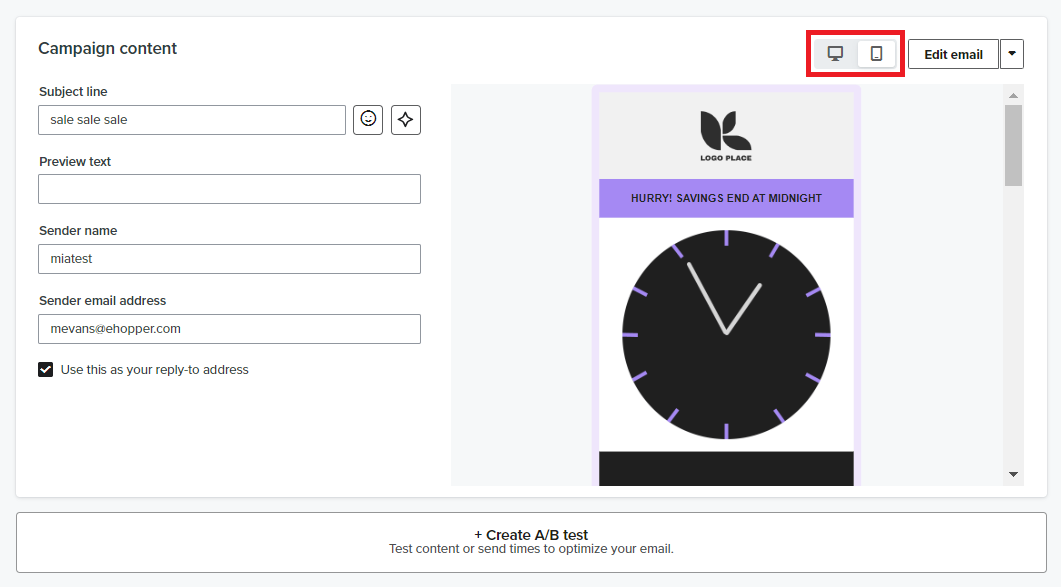
6.4 Fill in the fields on the form, and select your email design.
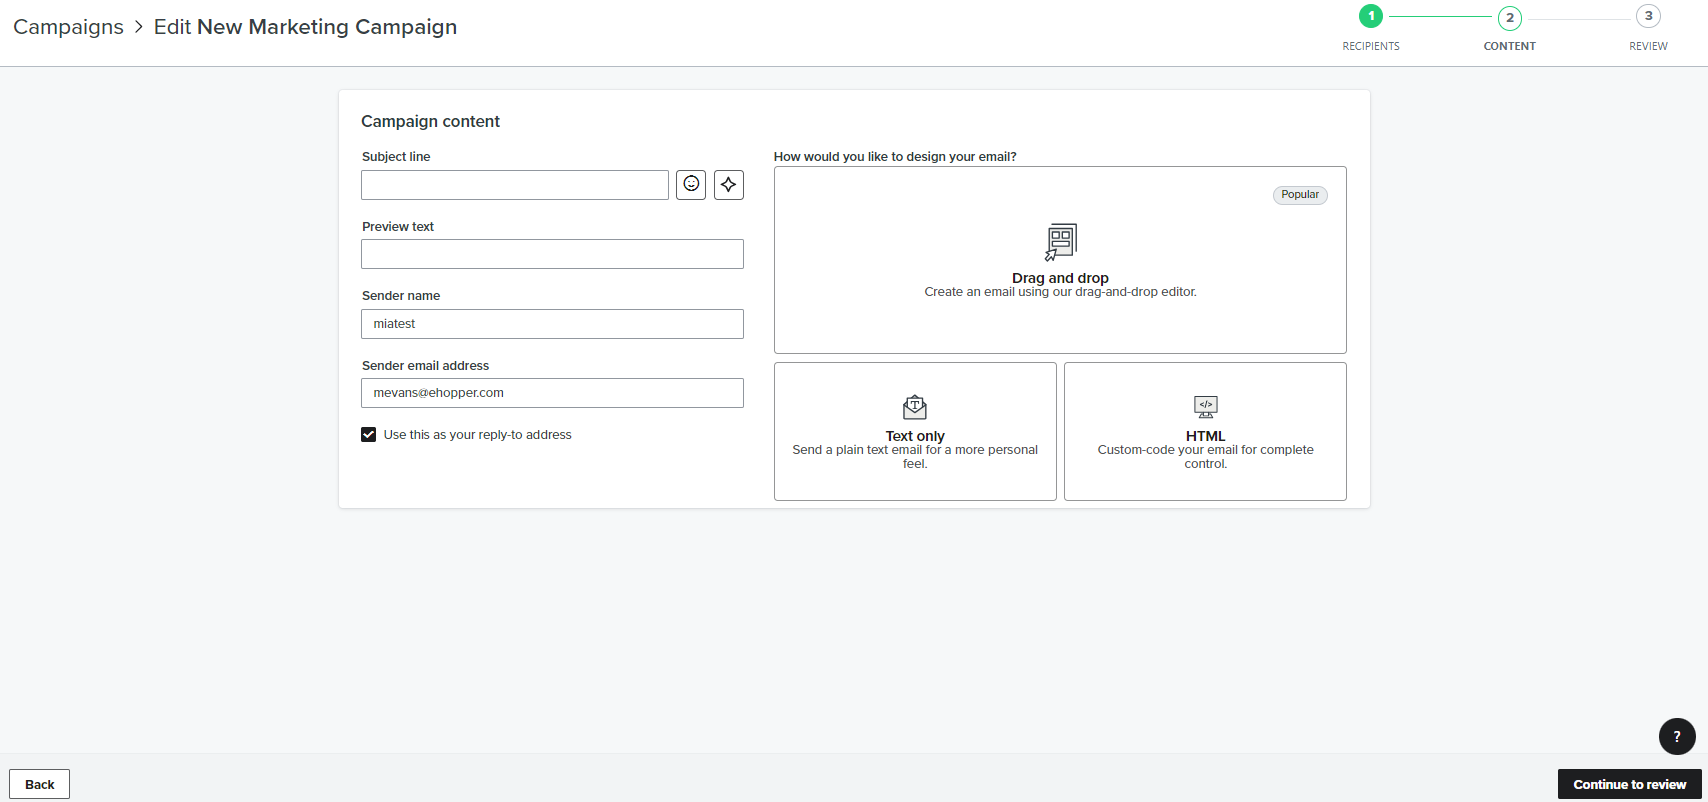
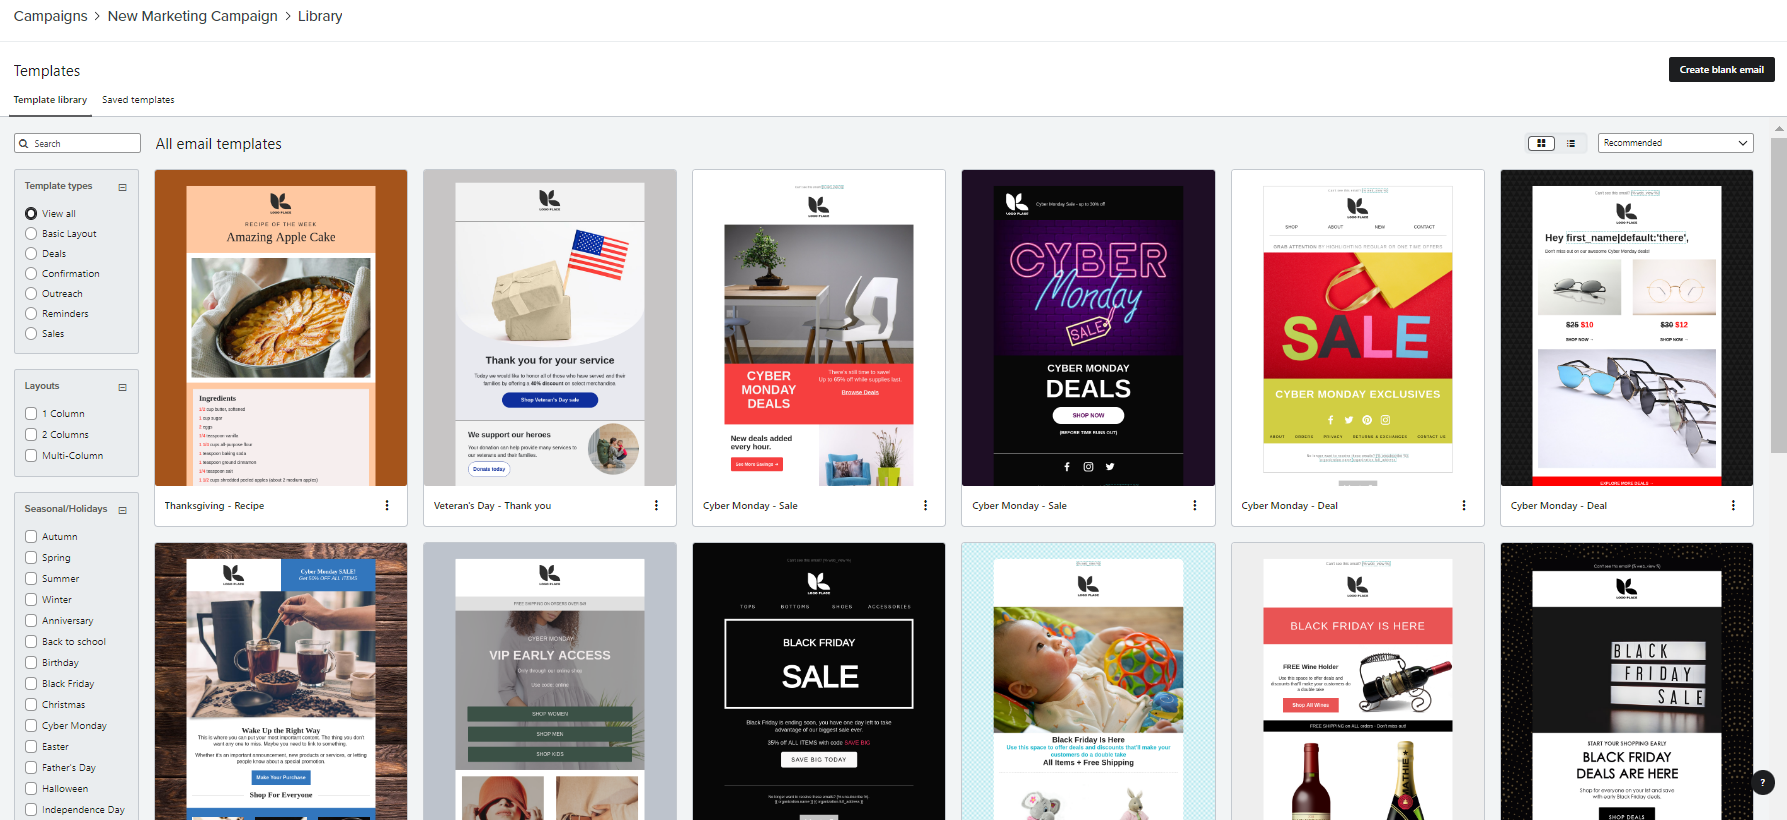
Selecting Drag and drop will allow you to choose a template and customize it to your needs, or create a new one from scratch.
Alternatively, you can select Text only or HTML for your email format.
Once your content is ready, you can preview both desktop and mobile version of what your customers will receive.
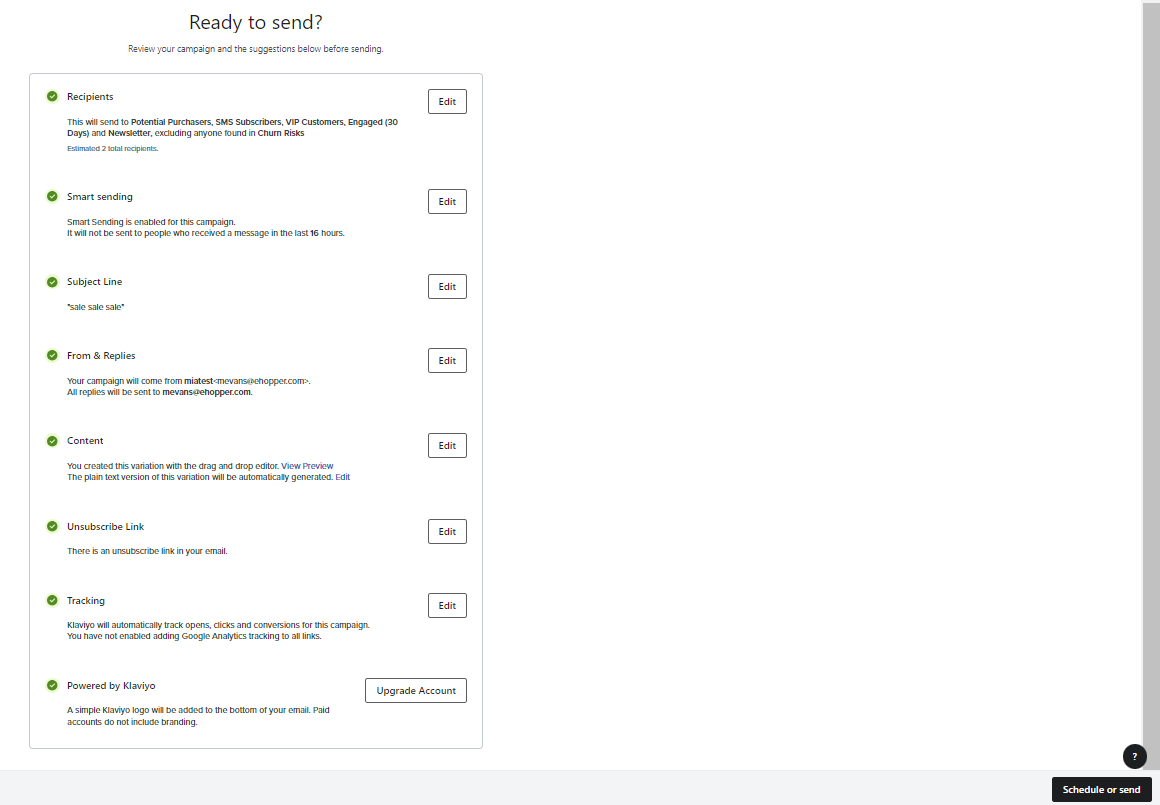
6.5 Click Continue to review, make sure all the info is correct > click Schedule or send.
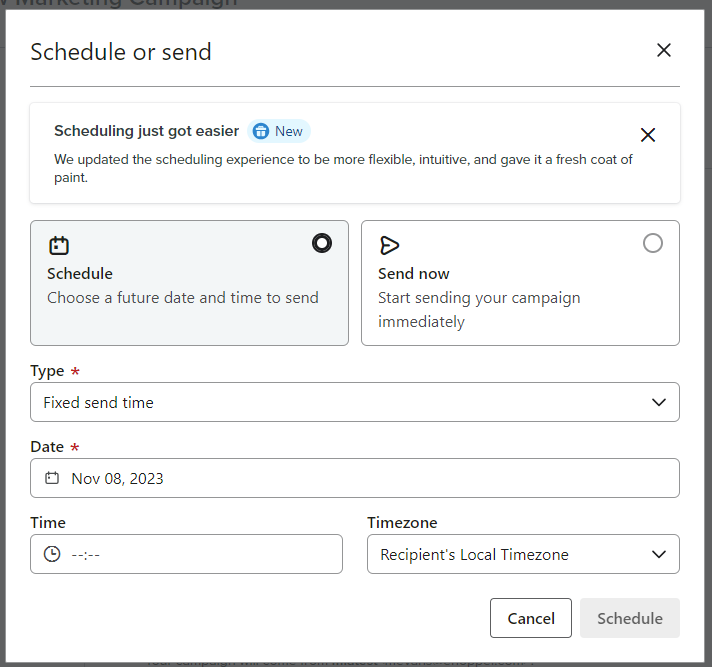
6.6 Select Schedule if you want the mailer to be sent out at certain hours (there is also a possibility to send out the emails in batches).
Select Send now for all for the mailer to be sent immediately.
Select Send now for all for the mailer to be sent immediately.
6.7 Return to Campaigns tab to see the status of your campaign.

Go to Home tab on Klaviyo navigation menu to review a brief summary of your campaign results. Go to Analytics tab to see more info.
Go to Home tab on Klaviyo navigation menu to review a brief summary of your campaign results. Go to Analytics tab to see more info.
Related Articles
Coupons for Online Ordering Website
Overview If you want to elevate your sales, you can use captivating discount pop-ups, coupon widgets, promo code displays, and coupon code promotions on your online ordering website. Instructions 1. Log into your website. 2. Go to Plugins > Add new > ...eCommerce and Online Ordering Integration
Table of Contents Overview Syncing POS with Ecommerce Syncing POS Products with Ecommerce Syncing POS Transactions and Stock Quantity with Ecommerce Syncing POS Taxes with Ecommerce Auto-printing of Kitchen Receipts for Online Orders Overview For an ...WooCommerce Integration
To connect an existing WooCommerce website to your eHopper account, please follow the steps below: 1. Go to your Back Office > Apps > App Directory > find WooCommerce app > click Install. 2. Install WordPress version 6.4.3. 3. Install and activate ...Set Up Auto-printing of Kitchen Receipts for Online Orders
Overview Save time and manual work by having eHopper automatically print kitchen receipts to your kitchen printer(s) as soon as online orders come in. Prerequisites Must have eCommerce app from the App Directory installed, or have created/upgraded to ...Setting Up QuickBooks with eHopper
Overview eHopper POS is integrated with QuickBooks Online. This allows users to automatically synchronize their sales, inventory, and revenue data with your QuickBooks Plus account, eliminating the need for users to manually input data from eHopper ...