WooCommerce Integration
To connect an existing WooCommerce website to your eHopper account, please follow the steps below:
1. Go to your Back Office > Apps > App Directory > find WooCommerce app > click Install.
2. Install WordPress version 6.4.3.
3. Install and activate WooCoommerce plugin version 8.6.1.
4. Install and activate PPOM for WooCommerce plugin by N-MEDIA version 32.
In case you've installed PPOM plugin v32 from a different place, please go to plugib editor, select your PPOM plugin and add:
if (!$ppom_cart_items) return $ppom_meta;
right below the line: $ppom_meta = array();
once done, pleae save it.
5. Install and activate Code Snippets plugin version 3.6.2.
6. Add the following code as a new snippet, name it Autocomplete orders Latest, save and activate:
add_filter( 'woocommerce_payment_complete_order_status', 'rfvc_update_order_status', 10, 2 );
function rfvc_update_order_status( $order_status, $order_id ) {
$order = new WC_Order( $order_id );
if ( 'processing' == $order_status && ( 'on-hold' == $order->status || 'pending' == $order->status || 'failed' == $order->status ) ) {
return 'completed';
}
return $order_status;
}
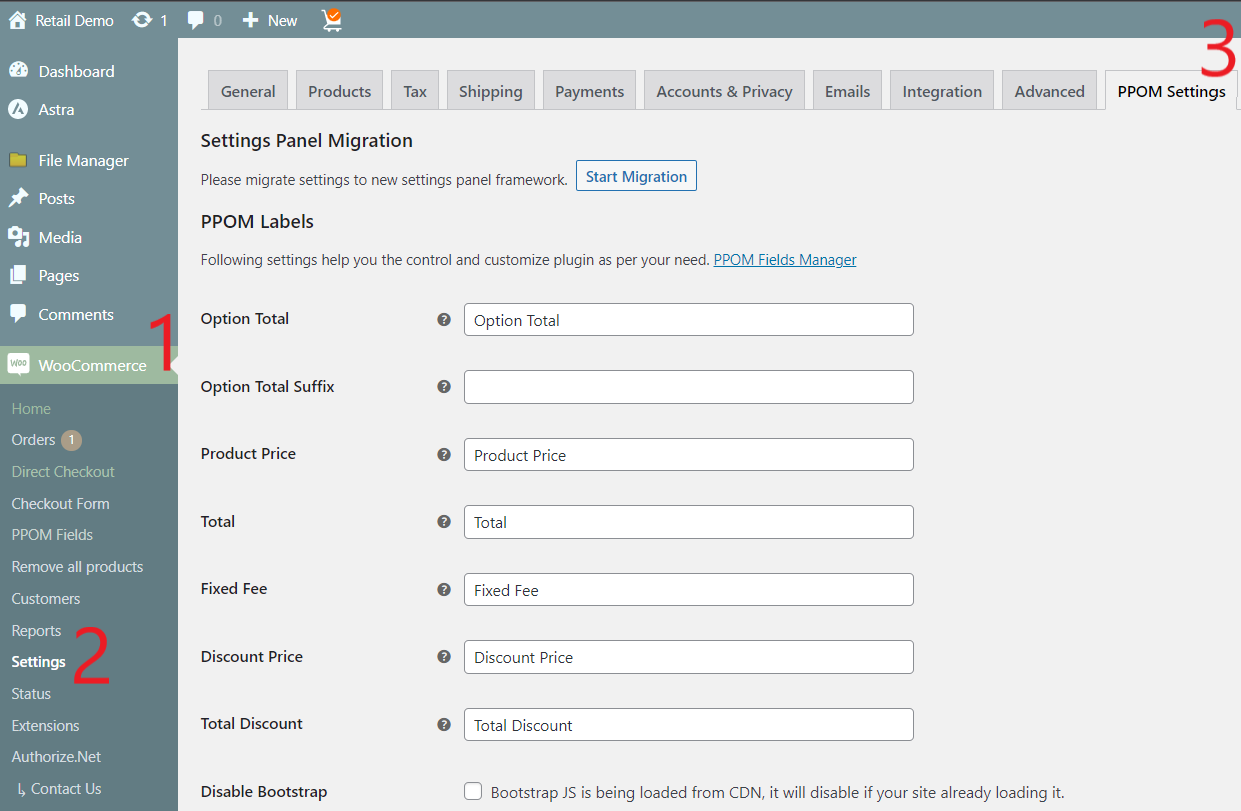
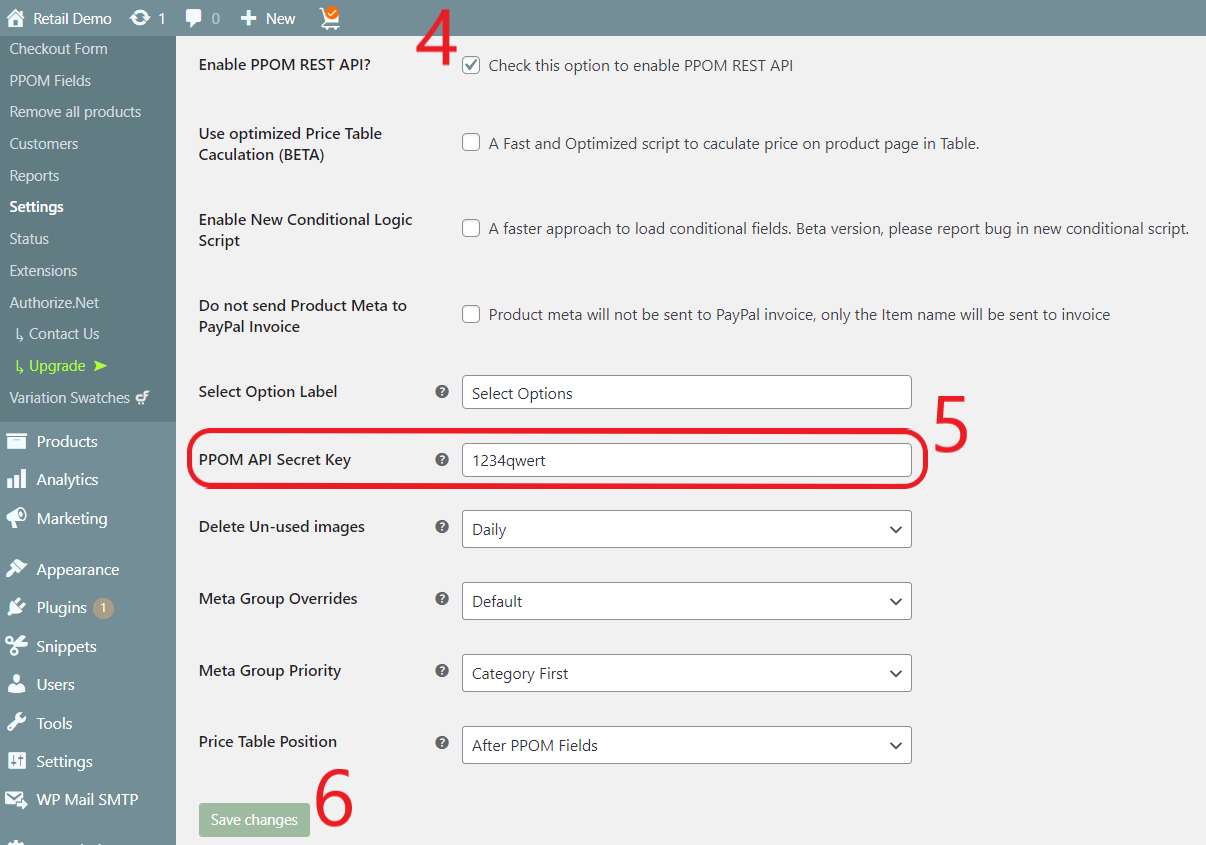
7. Go to WooCommerce > Settings > PPOM Settings > enable PPOM REST API > add an API Secret Key (the key can be random):
8. Install and activate Advanced File Manager plugin.
9. Open wp-config.php file, make sure the code below is set to false:
define(‘WP_DEBUG’, false);
define(‘WP_DEBUG_LOG’, false);
define(‘WP_DEBUG_DISPLAY’, false);
In case this part of code does not exist in you wp-config.php file, there is no need to add it.
10. Go to File Manager settings and check the box next to Dispaly .htaccess:

11. Open .htaccess file, and at the end of the text in a new line add the following text:
14. Create a product catalog in eHopper Back Office, mark the items you are going to sell online as Include in eCommerce, assign taxes, synchronize your data. After synchronization the products will appear on the website.
c. Please note that some plugins that have not been tested can interfere website performance and integration with your POS.
#HTTPS Basic auth enable
SetEnvIf Authorization “(.*)” HTTP_AUTHORIZATION=$1
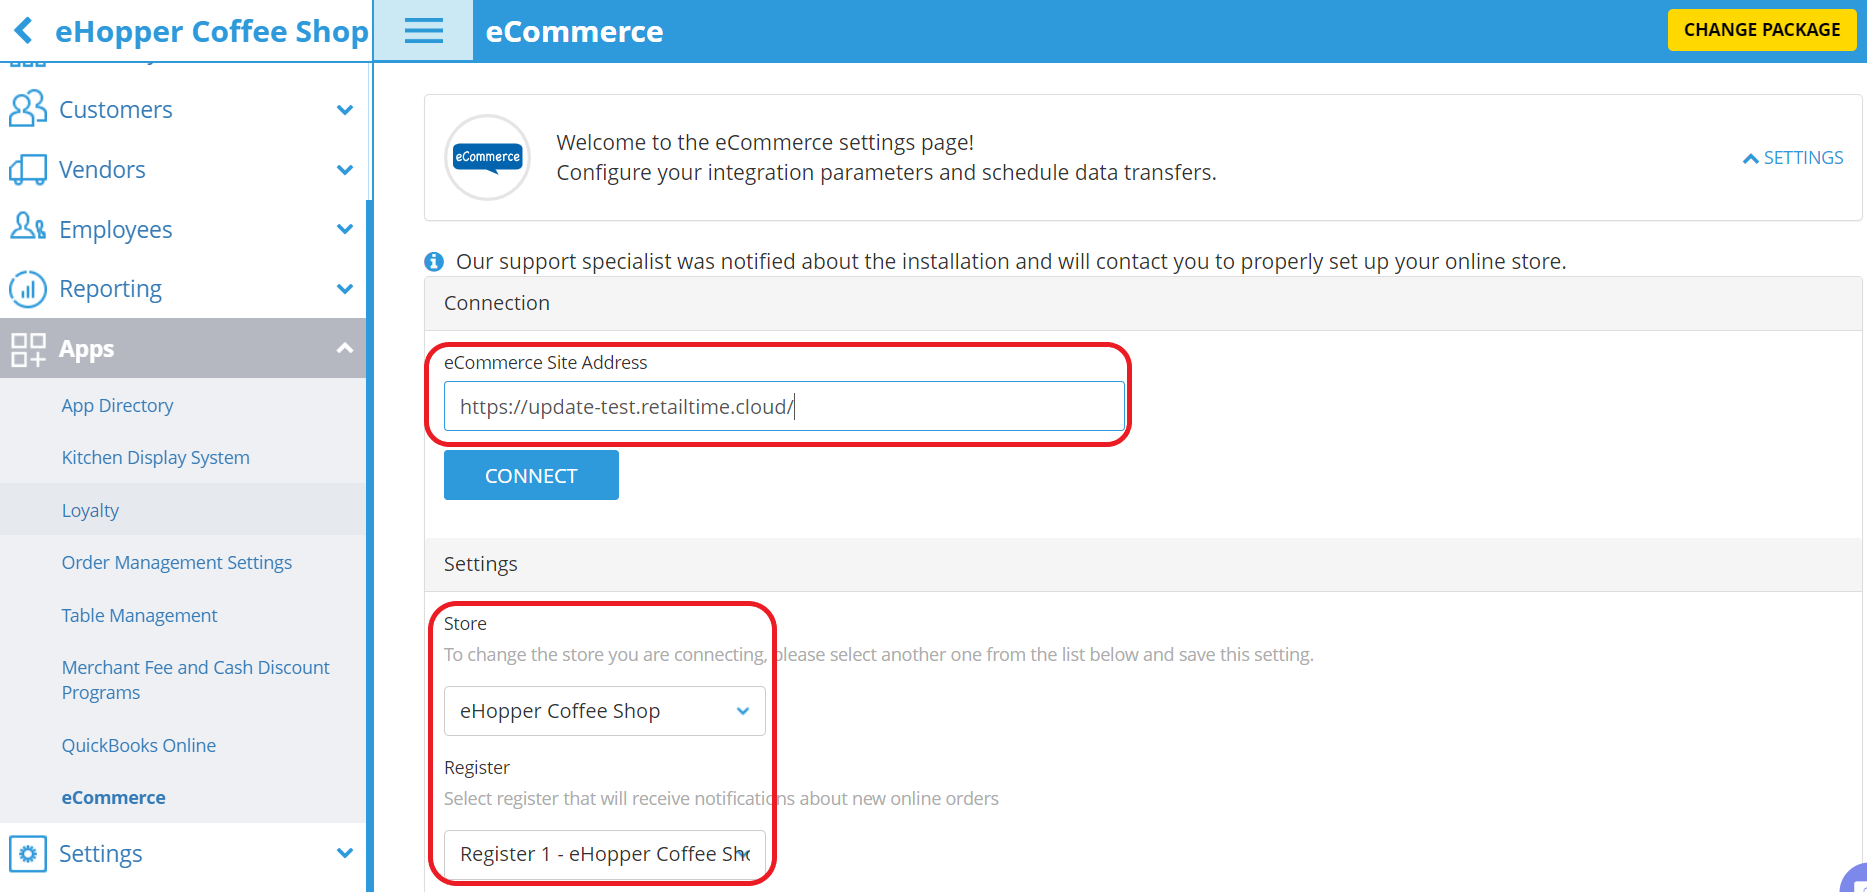
12. Go to you eHopper Back Office > Apps > WooCommerce. Enter your website address, select the store and register it will be connected to, click Connect:
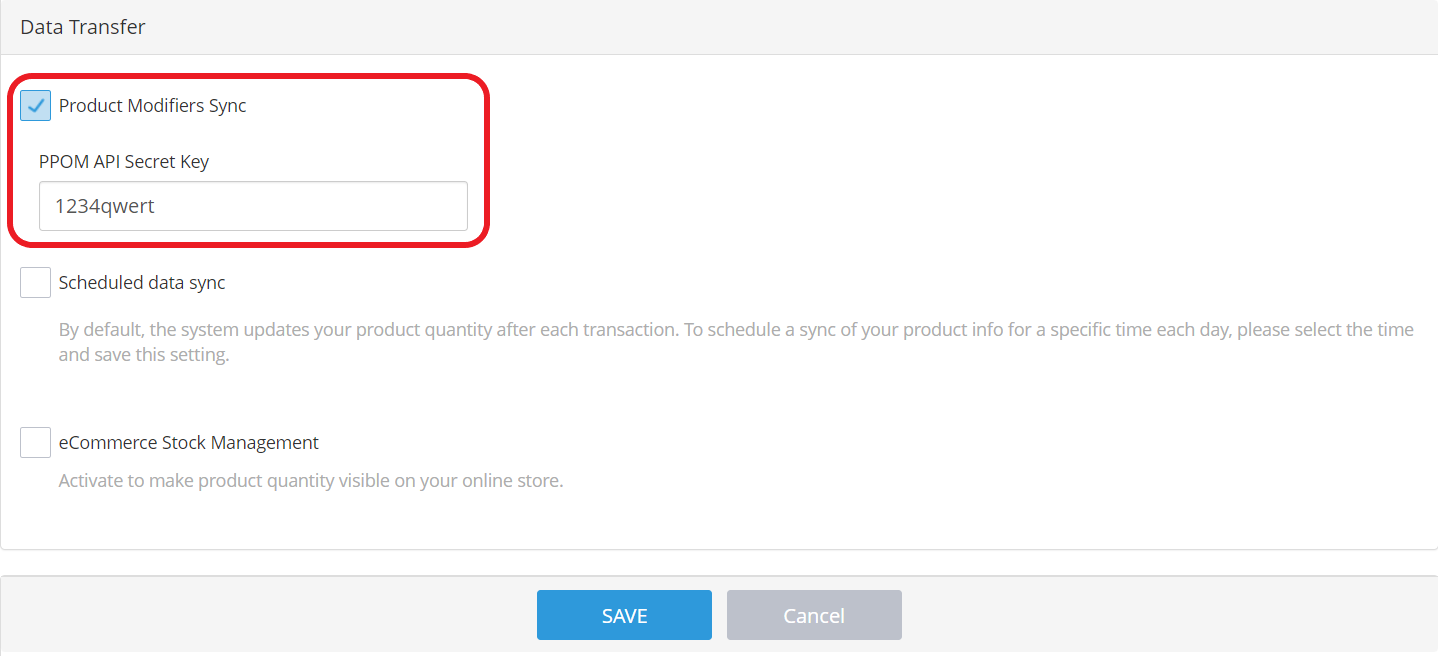
13. Enter PPOM API Secret Key, click Save:
14. Create a product catalog in eHopper Back Office, mark the items you are going to sell online as Include in eCommerce, assign taxes, synchronize your data. After synchronization the products will appear on the website.
Important Notes
a. Make sure that your hosting provider supports the integration. We tested GoDaddy, 1and1, LightSail from AWS.
b. Currently there is no product sync from WooCommerce to eHopper POS. Thus, the only way to synchronize products with eHopper is as described above.
c. Please note that some plugins that have not been tested can interfere website performance and integration with your POS.
Among supported plugins there are:
WooCommerce Authorize.Net Gateway
GoDaddy Payments for WooCommerce
WP Mail SMTP
Store Hours Manager for WooCommerce
WooCommerce Authorize.Net Gateway
GoDaddy Payments for WooCommerce
WP Mail SMTP
Store Hours Manager for WooCommerce
Related Articles
eCommerce and Online Ordering Integration
Table of Contents Overview Syncing POS with Ecommerce Syncing POS Products with Ecommerce Syncing POS Transactions and Stock Quantity with Ecommerce Syncing POS Taxes with Ecommerce Auto-printing of Kitchen Receipts for Online Orders Overview For an ...Coupons for Online Ordering Website
Overview If you want to elevate your sales, you can use captivating discount pop-ups, coupon widgets, promo code displays, and coupon code promotions on your online ordering website. Instructions 1. Log into your website. 2. Go to Plugins > Add new > ...Set Up Auto-printing of Kitchen Receipts for Online Orders
Overview Save time and manual work by having eHopper automatically print kitchen receipts to your kitchen printer(s) as soon as online orders come in. Prerequisites Must have eCommerce app from the App Directory installed, or have created/upgraded to ...Store Settings
Overview Changes made in Store Settings of a particular store will override default changes made to all stores in Company Settings. Any changes made in Register Settings for a particular register of that store will override default changes made to ...Setting Up QuickBooks with eHopper
Overview eHopper POS is integrated with QuickBooks Online. This allows users to automatically synchronize their sales, inventory, and revenue data with your QuickBooks Plus account, eliminating the need for users to manually input data from eHopper ...