How to Add Inventory without Access to Back Office
Overview
In case you need to add new items quickly to your inventory list, and either do not have access to your BO, or do not want to spend time creating items or importing an Excel file, there are two easy options for you: adding items by scanning their barcodes, or by manually entering product info in your POS app.
Instructions
A. Adding inventory items by scanning:
1. Go to your BO > Settings > Store settings > General tab > scroll down and check the box next to Quick Inventory > click Done.
2. Go to your POS app > synchronize.
1. Go to your BO > Settings > Store settings > General tab > scroll down and check the box next to Quick Inventory > click Done.
2. Go to your POS app > synchronize.
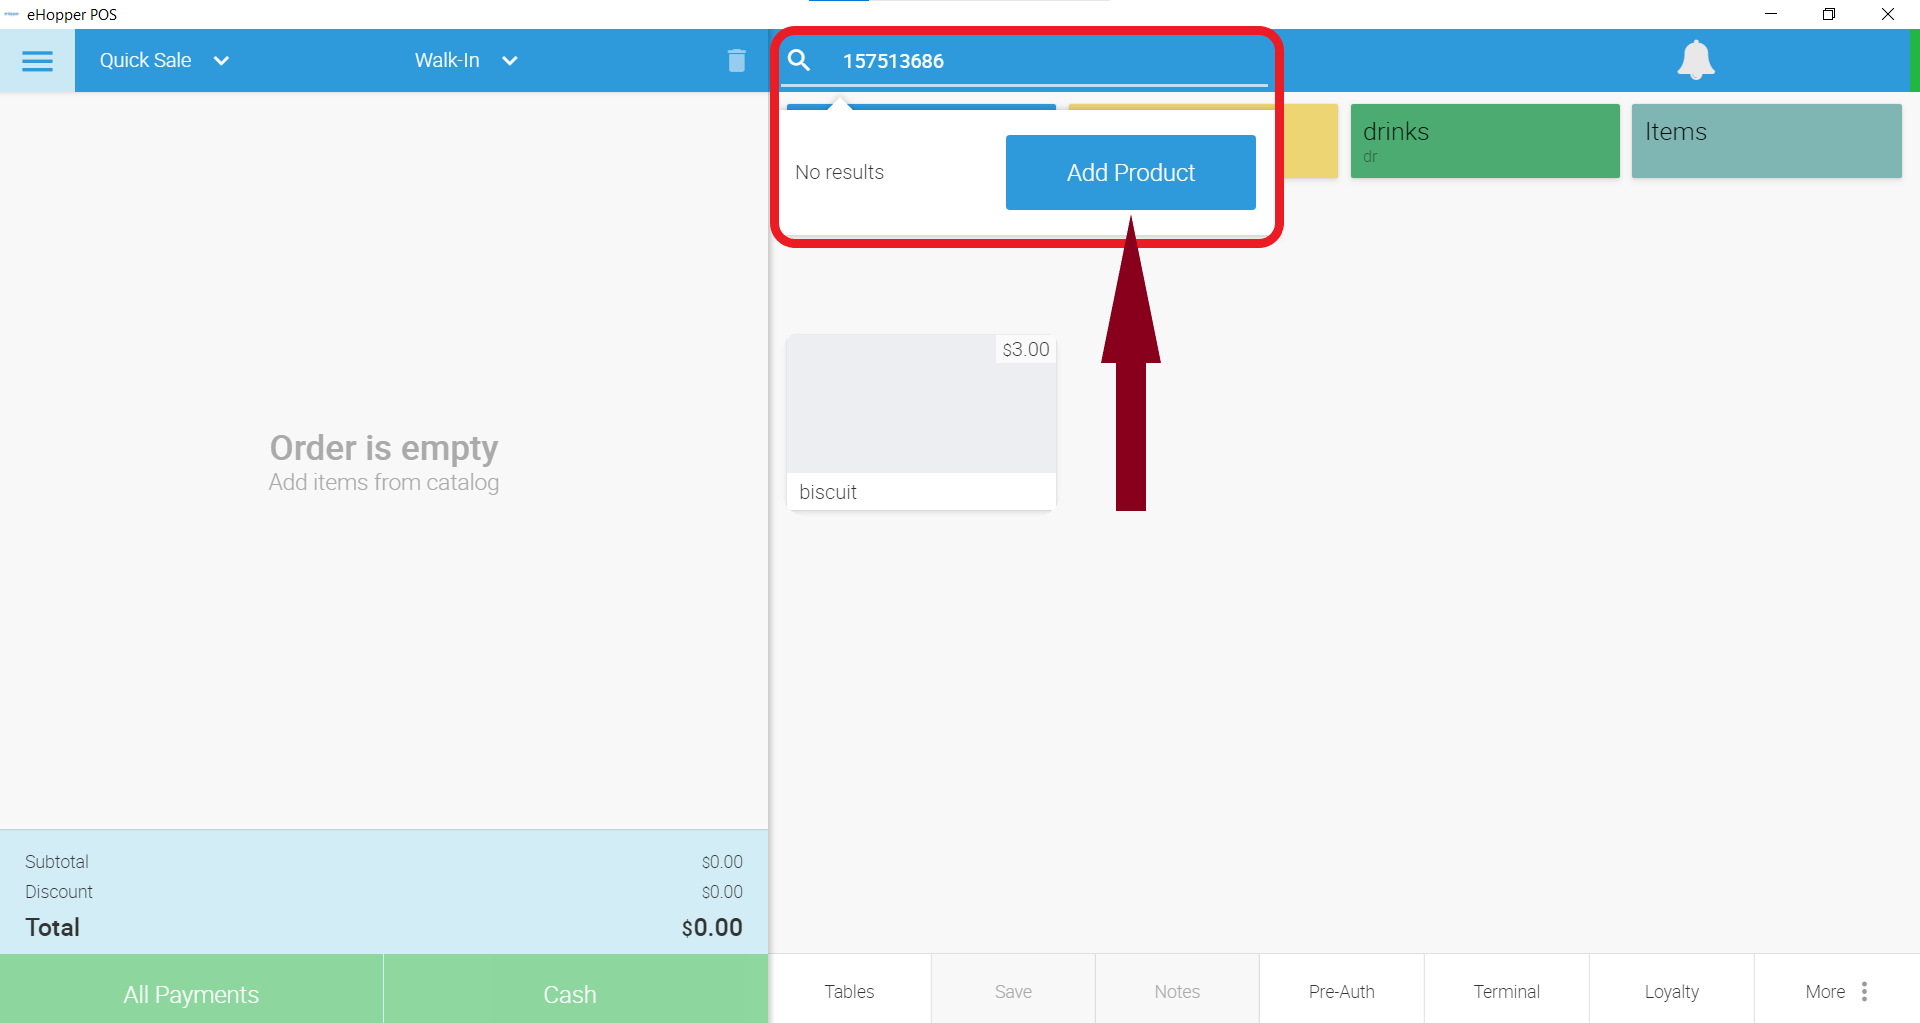
3. Scan the barcode of the item that needs to be added to your inventory. The barcode will be displayed in POS search bar, and an option to Add Product will appear:
4. Click Add Product and fill in Product Properties, click Done to save the product. You can also add the newly created item to cart if you switch on Add to Cart toggle:
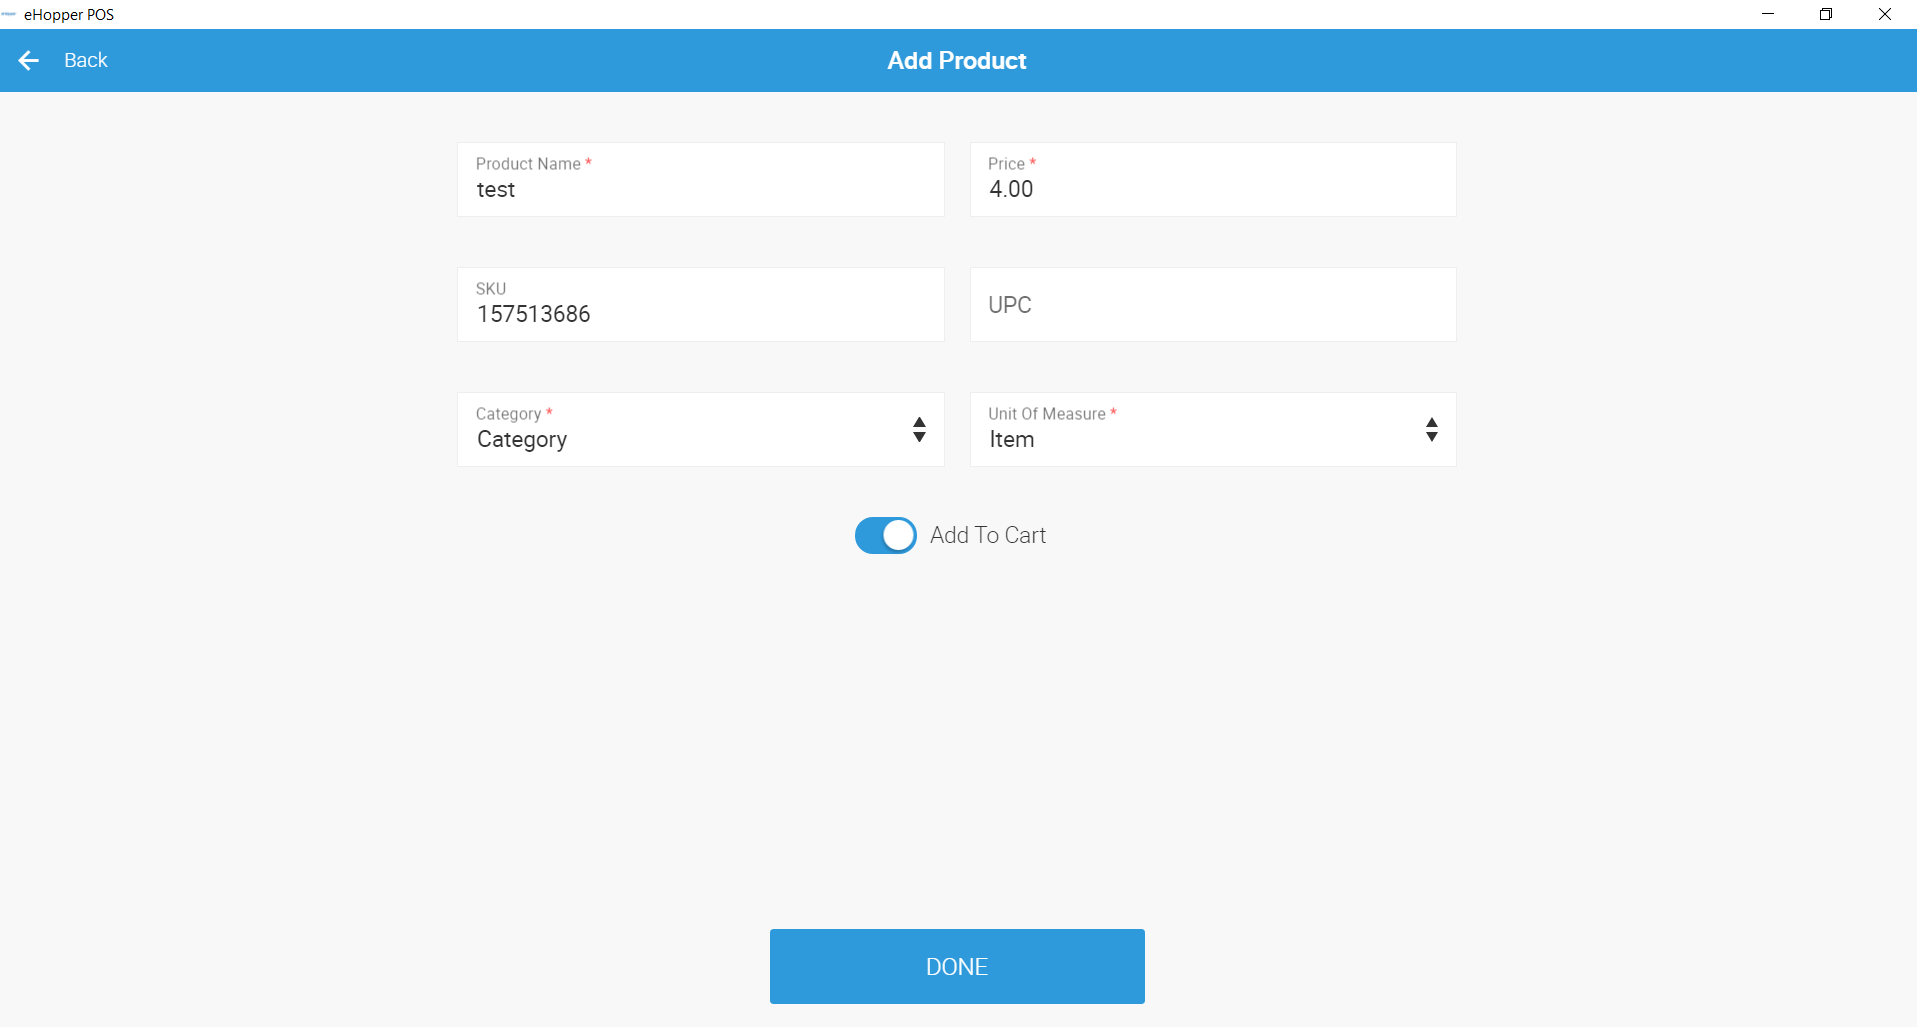
4. Click Add Product and fill in Product Properties, click Done to save the product. You can also add the newly created item to cart if you switch on Add to Cart toggle:
B. Adding inventory items without barcode scanner:
1. Go to your BO > Settings > Store settings > General tab > scroll down and check the box next to Quick Inventory > click Done.
3. Go to POS menu > Add Product:
4. Fill in Product Properties, click Done to save the product. You can also add the newly created item to cart if you switch on Add to Cart toggle:
All the items created with Quick Inventory option will be visible in both POS catalog and BO inventory list and reports. They can be edited in BO after adding through POS.
More info on Quick Inventory: https://portal.ehopper.com/portal/en/kb/articles/quickly-add-new-items-from-pos